As a Figure
Speech bubbles can be added in a few different ways. The easiest way is to use the speech_bubble.stk and thought_bubble.stk figure types that are installed with Pivot Animator and can be found in the Figures folder. These figures were made in the figure builder and so it is possible to edit them in a number of ways or even make new ones. The figures are made by bending line segments using the right mouse button to create the outline and then filling the center using the
polygon tool.
Add one of the figures to the animation using 'Load Figure Type' from the File menu, then set the scale and use the flip button if required, depending on which side of the stickman figure you want it to be positioned. Next, create the text you want to put in the bubble using the
Text Editor. After adding the text to the animation you need to set the scale so that it fits within the bubble and then position it. The speech bubble figures have an extra handle that you will see within the bubble area. Drag this handle while holding the Ctrl key to position it over the orange origin handle of the text object. Now select the text object and join it to that bubble figure handle using the
Join Tool. Now they can be positioned as a single object. Note that if you add the text object before the speech bubble then you will need to use the raise or lower buttons to change the draw order (z-order).
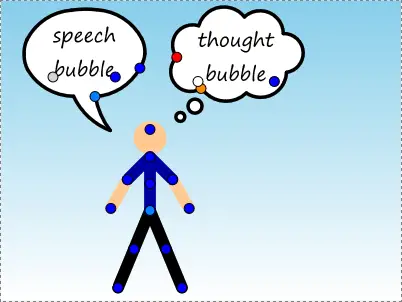
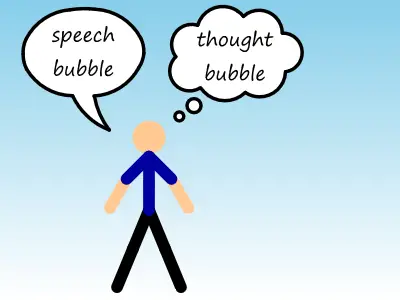
The speech and thought bubbles as seen during editing (left) and after exporting (right)
The font used for the text object is Segoe Print
As a Text Object
The
previous page describes how to create non alpha numeric symbols using the Webdings font.
Typing ')', ']', '}' or '(', '[', '{' into the Text Editor will create speech bubbles, as shown below. The outline thickness and colours then need to be set to create a black outline with a white center. They can then be added to the animation with another text object to place inside the bubble.
Joining the two text objects is a little more difficult that using the bubble figures described above. A new figure type will need to be created in the figure builder consisting of a single line segment with 0 thickness. This can then be added to the animation and the angle and length set using the Ctrl key so that the line extends from the red handle of the bubble object to the orange handle of the text object. Both objects can then be
joined to the line so that they move as one object.
One advantage of this method is that the Ctrl key can be used to stretch the speech bubble text object to change it's shape depending on the text you want to put inside it.
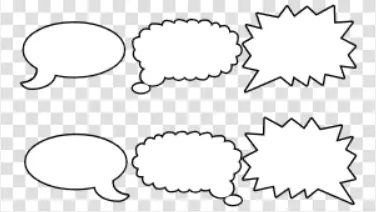
Speech bubbles created using Webdings font with the characters ')', ']', '}' and '(', '[', '{'
As a Sprite Image
A speech bubble image can be created in graphics software or downloaded from the web as a gif or png image and loaded into Pivot as a
Sprite. The text could be added in Pivot as a text object or included in the original image. However, using sprites is not the best option for a couple or reasons. Firstly, they would look pixelated when you zoom in using
canvas zoom or the
virtual camera. Secondly, they will use up a lot more space in memory and in the saved .piv file.