Text objects can be added by clicking '
Create Text Object' in the File menu. The text editor window will then appear. Add the required text in the edit box at the top. The preview will update after each new line (press enter) or after clicking on one of the other controls. The font can be selected from the drop-down list or typed in. The colour can be selected by clicking on the button below '
Fill Colour'. The text can also be given an outline by increasing the
Outline width and setting the
outline colour. Colours can be semi-transparent by setting the opacity in the colour selector. Italic and Bold styles can also be applied.
The outline option is useful for creating subtitles for your animation. Subtitles are normally white with a black outline so that they are always visible regardless of the colour behind the text.
The gradient option can be used to create a vertical fade between the 'Fill Colour' at the bottom and 'Gradient Colour' at the top. The outline is unaffected.
The multi-line alignment options determine how multiple lines of text align to each other and is only enabled if multiple lines of text have been added into the edit box.
Click 'Add' to add the text object to the animation as a new figure type. Text objects behave like a figure type with a single segment. As such they can be moved around, rotated, scaled or selected from the figure selector by clicking the 'Add Figure' button. However, text object cannot be edited in the figure builder. Editing a text object by clicking the edit button in the selected figure controls will open the text in the Text Editor.


If you have rotated a text object and want to align it to be horizontal again then you can do this easily by placing the mouse cursor over the red handle of the text object and pressing the right arrow key while holding the Shift key, as described on the
Segment Alignment page.

Dragging the red handle while holding the Ctrl key will have the effect of stretching the text horizontally.
The text editor window (left) and after adding to the animation with rotation, scale and stretching (right)
Menu Controls

The menu controls can be accessed by clicking the menu button at the top right of the Text Editor window.
 Open:
Open: Load a text object from an STK file. If the STK file is not a text object then it will not open and a message
will be shown.
 Save As:
 Save the current text object as an STK file.
 Modify Existing Text Object:
 Modify the text object being edited in all frames. This is similar to
Modifying Existing Figure Types in the figure builder and is only enabled if the text editor was opened by clicking the edit button.
 Help:
Help: Open this web page in the default browser.
Fonts
Text objects support
True Type Fonts. The drop-down list of fonts will show the true type fonts that you have installed. You can download and install other true type fonts from the internet. Fonts can be installed for Windows by right clicking the .ttf file and selecting 'Install for all users'. The list will then include the newly installed fonts after restarting the Pivot.
Pivot Classic will appear at the top of the list of fonts. This font has been created to replicate the alphabet character figures included with earlier versions of Pivot, and makes it possible to have the classic Pivot text style without the need to load and position each character figure manually. This font can also be used in other applications such as Microsoft Word.
If you are editing an animation created on another computer with text objects using fonts that you don't have installed, then everything will look fine in the animation, but if you try to edit the text object then a warning message will show to tell you that a font is missing and the font will be reset to default.
Creating Non Alpha-Numeric Symbols
There are various ways to create non alpha-numeric symbols using the text editor. This is useful for quickly adding certain objects that would take time to create using the figure builder or for adding text in languages that use non Latin script. The first method is to use one of the symbol fonts such as
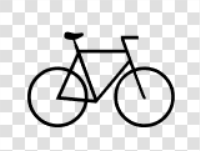
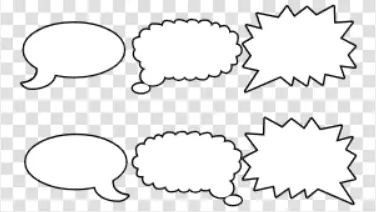
Webdings. The symbol fonts are marked with a * before the font name in the drop-down list. For example, typing the letter 'b' using Webdings will create a bicycle and typing ')', ']', '}' or '(', '[', '{' will create speech bubbles, as shown below. For the speech bubbles, the outline thickness and colours were set.


Alt codes can also be used under Windows by typing a number using the number pad while holding the Alt key. You can't type them directly into the edit box in the text editor, but you can type them into a text editor program such as Notepad and then copy and paste the result into the Pivot text editor window. The following card suites were created with Alt+3, Alt+4, Alt+5, Alt+6 using the Candara font. The appearance can vary with font.
Finally, the text editor supports many
Unicode characters, which includes thousands of symbols, including those from non Latin scripts such as Japanese. The following was created by translating the word 'Pivot' into Japanese using
Google Translate and copying and pasting the result into the text editor (the symbol for 'Pivot' is the same in Chinese). Normally the appearance will not vary with font.