Videos provide the best quality output as a single file and can easily be uploaded to
YouTube or other video sharing site. Videos can also be edited in video editing software for adding additional effects, captions or audio. The Video options enable you to select from various widely supported video formats depending on your preference.
Click 'Export Animation' in the File menu and select Video from the submenu. Then specify a file name and location and click 'Save' to display the video export options. After setting the options, click 'Export' and wait for the progress bar to reach the end. Open in a video player such as Windows Media Player or VLC to test the exported video.
Make sure that the speed of your animation is correct when playing before Exporting the animation because the same frame rate will be used when exporting the video. This can be adjusted using the scroll bar next to the Play and Stop buttons.
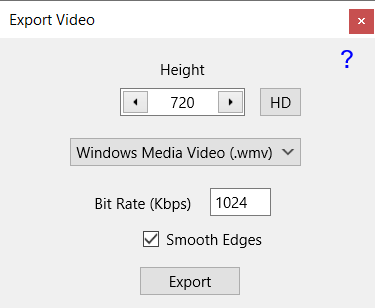
Video export options
Height
The Height option allows you to specify the dimensions of the exported video. The default value matches the height of the animation set in
Options, unless the animation height is less than 400, in which case the default height is doubled to improve quality. The width is determined automatically from the animation aspect ratio. Use the
HD button to set a height of 1080 corresponding to High Definition video. A larger value will increase quality but also the file size.
Supported Formats
WMV - Windows Media Video. Good compression and quality. Is supported by YouTube and most other video sharing sites but may not be supported by some non Windows devices.
WEBM - Designed for use on the web. Good compression and quality for videos streaming. Is supported by YouTube but not as widely supported by some video players or devices. This is the only format that supports transparency.
MP4 - Using MPEG-4 Part 2. This is an older format than the more recent and popular mp4 h.264 codec, which is not currently implemented due to licensing restrictions. The compression and quality are still fairly good. This format is the most widely supported in various video players, video sharing sites and devices.
FFV1 - Lossless avi video. The resulting video will have the same quality as playing the animation in Pivot. However, the resulting file will be larger than the other formats. It is also not as widely supported by video players or by YouTube. This is a good option if you plan to do further editing or adding sound in a video editor (as long as the video editor supports FFV1). FFV1 videos can be played and converted using
VLC media player. Bit rate is not used for this format.
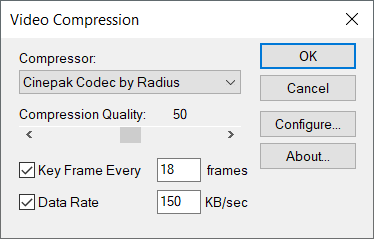
Windows AVI. This option offers a variety of video formats with extension .avi and gives the same result as video export in Pivot Animator 4. Leaving the
Compress option unselected will produce a large video with no compression and no loss of quality, but be careful that you have enough disk space. Selecting Compress will show a Video Compression options window after clicking Export, where a variety of settings can be chosen. Any additional video codecs that you install under Windows will appear in the Compressor list. For example,
Lagarith is a good free codec to install if you would like no loss of quality, but with a much smaller file than uncompressed.
The AVI Video Compression options window, which is shown when Windows AVI is selected
and the Compress option is chosen. The compressor list shows all codecs you have installed.
Bit Rate
The bit rate (measured in kilobits per second) can be set to vary the quality of the video output, where a higher value typically gives better quality but also a larger file size. The default value of 1024kbps corresponds to 1 megabit per second and provides good quality for any of the formats. Reduce the value if a smaller file is needed.
Note that increasing the value beyond a certain amount may not make much difference to the resulting video. If the quality is too low even with a high bit rate then consider increasing the Height value.
The value can be typed in or increased or decreased by dragging right or left in the box or more quickly by dragging up or down.
Smooth Edges
When enabled, the figures will have smooth
anti-aliased edges as they do when editing. When disabled, the figures will have jagged aliased edges, which is equivalent to exporting in Pivot 4 with Super Sample set to 1. Most of the time you will want Smooth Edges enabled as it is by default. However, disabling may be useful if you want a more retro look or because you want to fill areas after exporting.
Transparency
Most video formats do not support transparency, with the exception of WebM. If the animation uses a transparent background then those areas will appear black in the exported video unless WebM is used. Even WebM will appear black when played in most media players but will be transparent when shown on a web page or imported into some video editing software. Consider exporting to Animated
Gif or
Png if transparency is needed.